

How to Make Your Own Stuffed Horse Toy
We enjoyed making our own stuffed horses and hope you will enjoy this craft too!
Materials you will need:
- Felt (or fabric)
- Yarn
- Scissors
- Pins
- Colored pencil or crayon
- Needle and thread
- Sewing Machine (optional)
- Stuffing
Step 1: Print out the horse toy template
 |
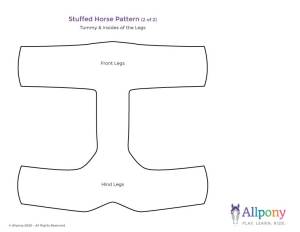 |
| Stuffed Horse Pattern 1 Sides and Ears (PDF) | Stuffed Horse Pattern 2 Tummy and Insides of Legs (PDF) |
The horse pattern will look something like this… 
Step 2: Trace the horse toy template onto the fabric
Cut out the pattern and use it as a template to trace the horse onto your fabric. I highly recommend using felt for the horse’s body because it is easier to work with than fabric and the edges don’t fray. We used a white colored pencil to trace the pattern so the lines are visible. 
Step 3: Cut out the horse pattern
Make sure you trace the horse’s body twice, flipping the pattern over for the second side so the traced lines won’t show on the final product.  This is what our horse looked like once we cut out the pieces…
Step 4: Pin the horse together
Use pins to attach the underside of the horse and inside of the legs to the body. 
Step 5: Sew the horse
You can use a sewing machine or hand stitch the horse together. Remember to leave an opening so you can turn the horse right side out and stuff it.  We left an opening on the underside of the horse and made sure it was about 2″ long.
Step 6: Turn the horse right side out and stuff it
A pencil works well to help push the legs and head open and also to push the stuffing into the smaller sections. Use a little bit of stuffing at a time, working from the furthest tips of the legs and nose. Work your way to the main part of the body. You want the areas where the legs meet the body to be extra firm so the horse will stand up. 
Step 7: Sew the horse closed
Hand sew the tummy closed with a needle and thread in the color that matches your pony. I used a light blue thread here so you can see it easier. Make sure all of the stuffing is pushed inside as you sew. 
Step 9: Sew on the ears
Fold over the bottom 1/4″ of an ear and pinch it together. Sew the bottom of the ear together with a stitch to hold it closed at the bottom. Place it on your horse and sew it in place. Repeat on the other side.  We used a light blue thread so you can see the stitches.
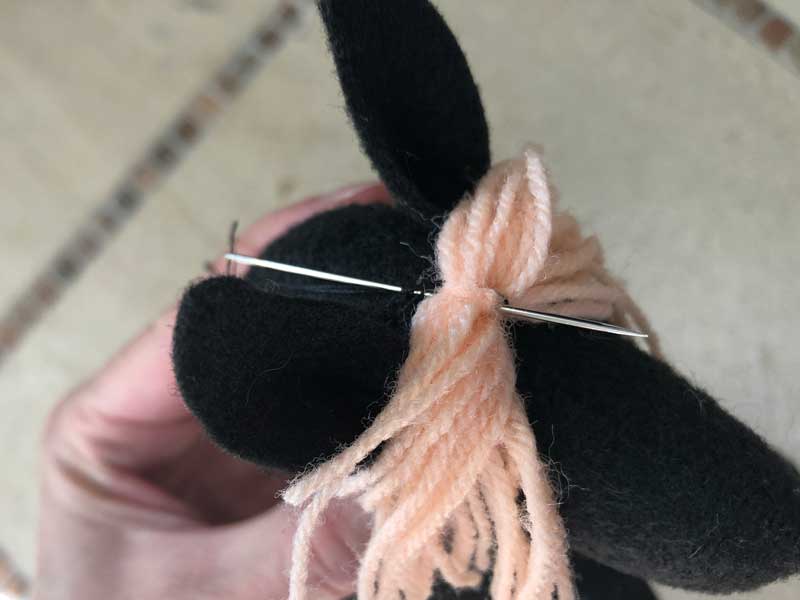
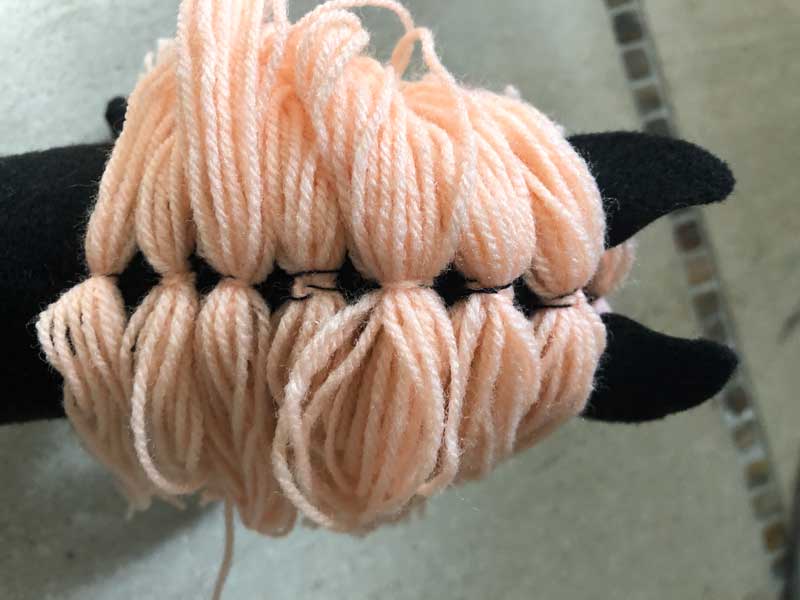
Step 10: Create the mane
Create bunches of yarn by cutting it in equal lengths. Tie one of the strands around the bundle. Repeat this until you have enough bunches for the mane, forelock, and tail. Sew them on by hand to secure them into place.
 |
 |
 |
 |
The final product!
Your very own pony pal to play with. We added markings to customize our horses. So cute!
